This was my first carving. I had booked a lesson with Mike Painter but wanted to go with a clear, well prepared plan.
Why?
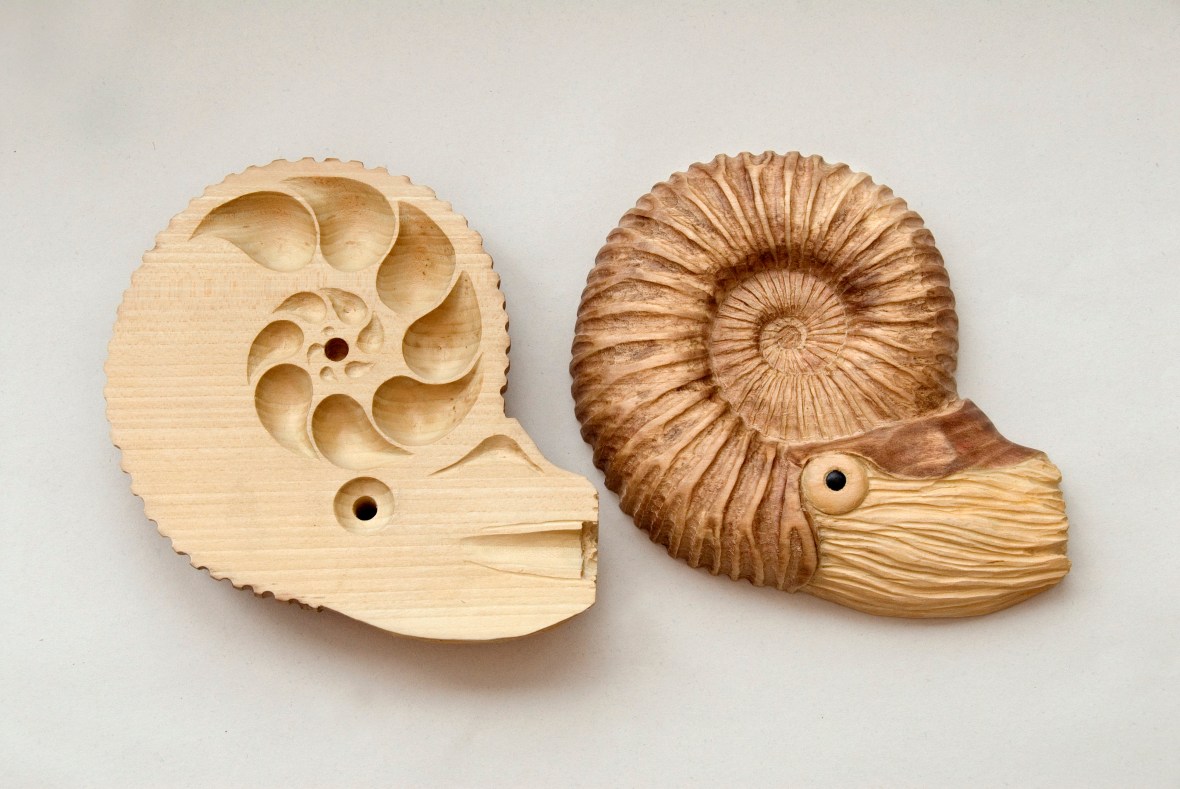
Obviously it needed to be something simple. I had a small fossil ammonite and, with this in mind, I thought I could make a box with a lid in the form of an ammonite. I scanned and enlarged the fossil to create an A4 image from which to work. It was clear from that, that each of the internal compartments of the shell would be too small to hold more than one or two peanuts. But the idea had taken hold. I decided to persevere and make a carving of the ammonite in two halves showing the internal structure and the living animal. I sourced the wood (lime) and went for my first lesson.
How?


When I explained what I wanted to do Mike went very quiet for a very long time. At last he asked how I planned to hold the work, (always a major consideration). I had thought that through and with that my journey began.
The two halves had to come together as a whole so, once cut out on the band saw, I clamped them together and drilled through the eye and the centre of the spiral and was able to locate both pieces of wood onto a base board with dowel and use what was to be the head as a clamping point. This gave me rapid and easy access to both sides of the work and enabled me to take measurements from both pieces which were mounted as mirror images.
The first task was to mark the centre line of the spiral shell and begin to remove wood from the outside of the ammonite. It was fortunate that there was so much to remove; by the time I got near the finished level of the piece I was beginning to understand how to use the chisels and work with the grain of the wood. It was essential not to lose the line of the spiral, both aesthetically and because both sides had to match. As soon as the line was chiselled away it was redrawn. Wood was removed and the inside line cut in with a flute thus giving me a little leeway for fine adjustment as I went along. Eventually I had roughed out the outside of both sides of the shell and was able to put them together using the dowel.
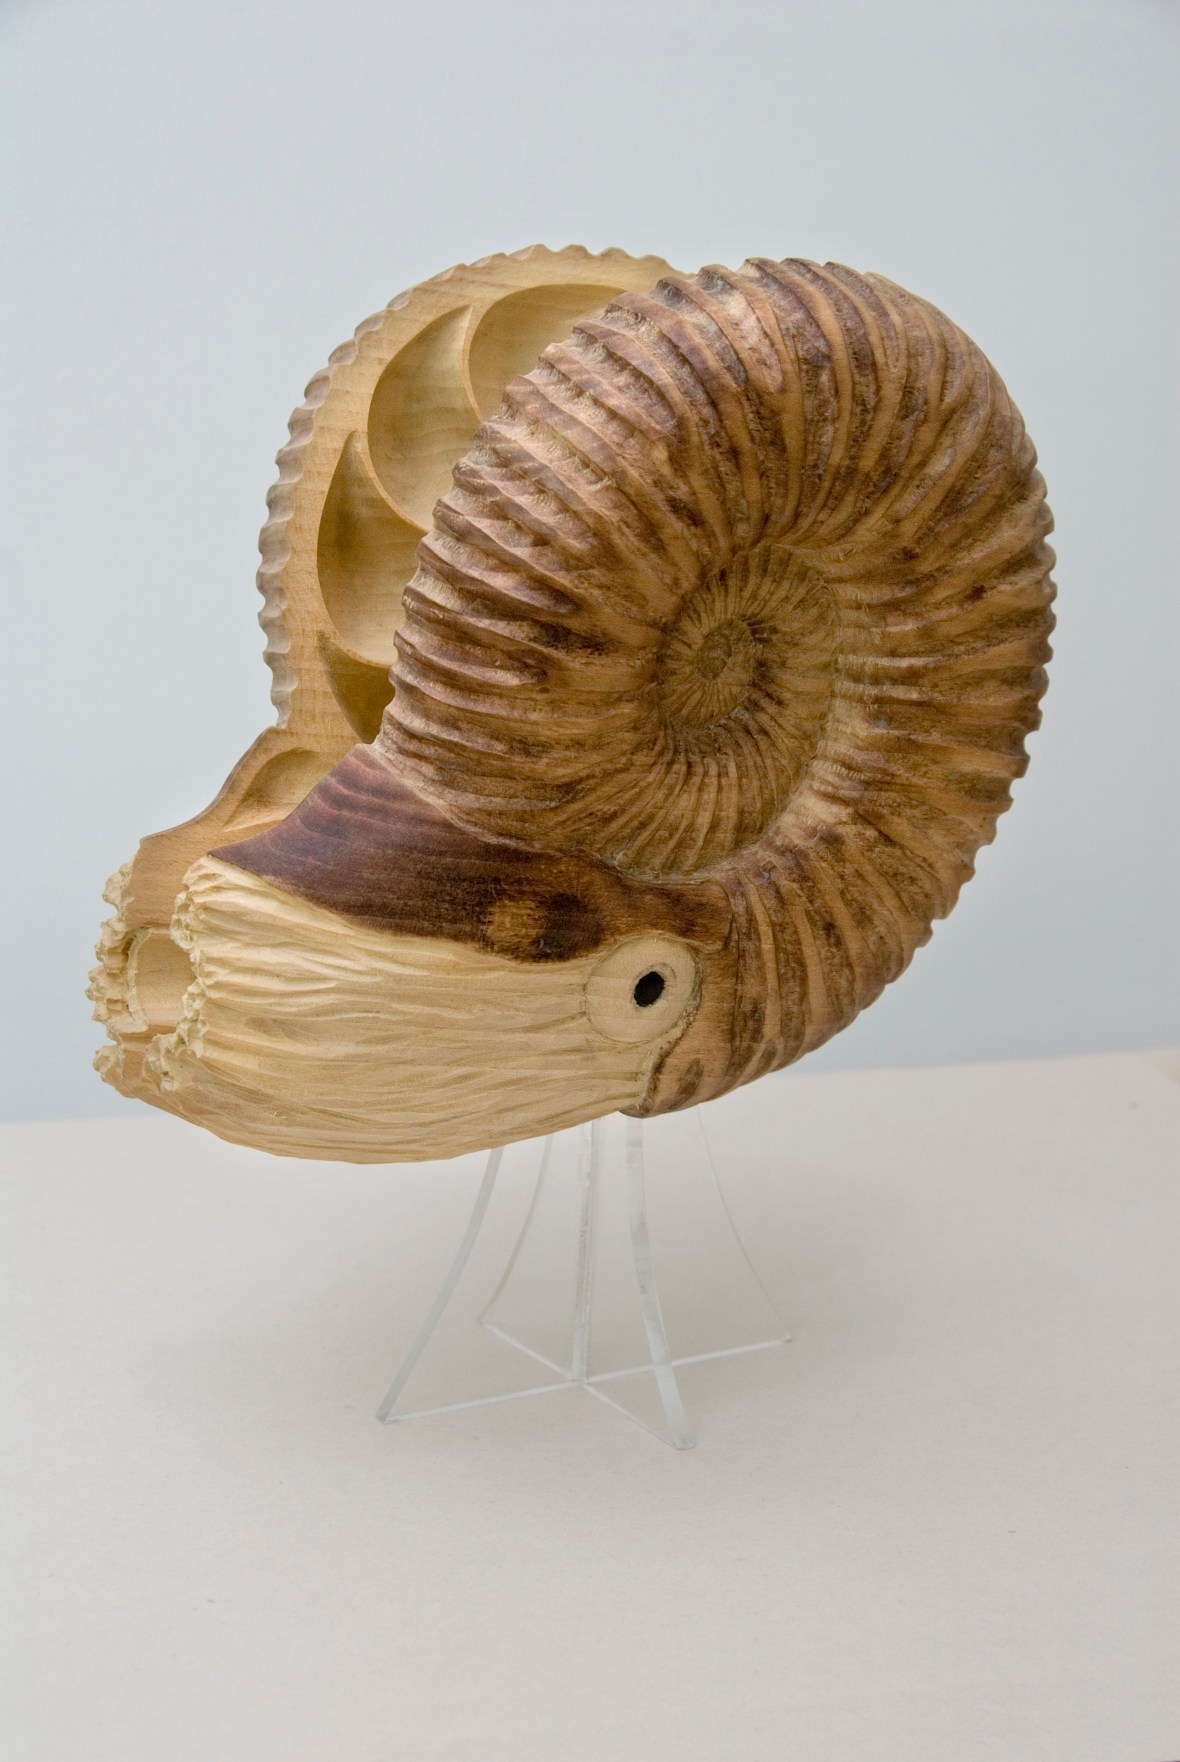
With both sides clamped together it was easier to see the form of the finished piece and see where material had to be removed to give a smooth curve on every direction. Eventually I had a good outline of the form of the shell including the hood and could work on the detail. The grooves were cut in and left as a tooled finish and the high points sanded to a smooth finish. Once one side was finished the two halves were located together and the pattern of ridges outlined and continued on the other side.
Carving the inside

The compartments of an ammonite shell are the flotation chambers of the animal. Once the internal spiral had been outlined the compartments were drawn in and carved with a gouge. It soon became clear that I needed to invest in a couple of spoons to complete the bowl shapes. The hole I had drilled through the eye was a little rough and a circular depression was carved on the inner surface to set it off. The inner surface of the hood was suggested in the same way as was the interior of the siphon. Finally the inner surfaces were sanded smooth.
Carving the Head
To work out the shape of the head a full sized maquette was made in plasticine but I was worried that the tentacles were going to be a problem. I was assured that carving them was just like carving hair. Since the eye position had already been established it was relatively easy to work from there and rough out the outline shape of the mass of tentacles. The tentacles were suggested by using different sized flutes and gouges to cut in non parallel grooves of differing widths and depth. A gouge was then used to vary the levels of the top surfaces and finally pushed into some of the lower levels to suggest further depth and produce contrasting shadow.
The carving was now almost complete. The pupil of the eye was made from dowel fashioned from an African Blackwood pen blank. The centre of the shell, where the peg had been, was filled in the same way using lime.
Surface Finish
The finished carving was given two coats of Danish Oil. The outside of the shell was stained using two coats on the hood with the head and inside left as the natural colour. Finally two coats of wax were applied and all that was left was to work out how to display the carving.
Display Stand

Showing both the inside and outside of the carving was always going to be a problem. Clearly the two halves needed to be linked but still separate. The solution lay in the 9mm hole drilled in the centre of the shell. The two halves could be separated by a few centimetres on a dowel and suspended on a central pillar. It looked awful but if it could be held in a shallow V shape the result could be very pleasing.
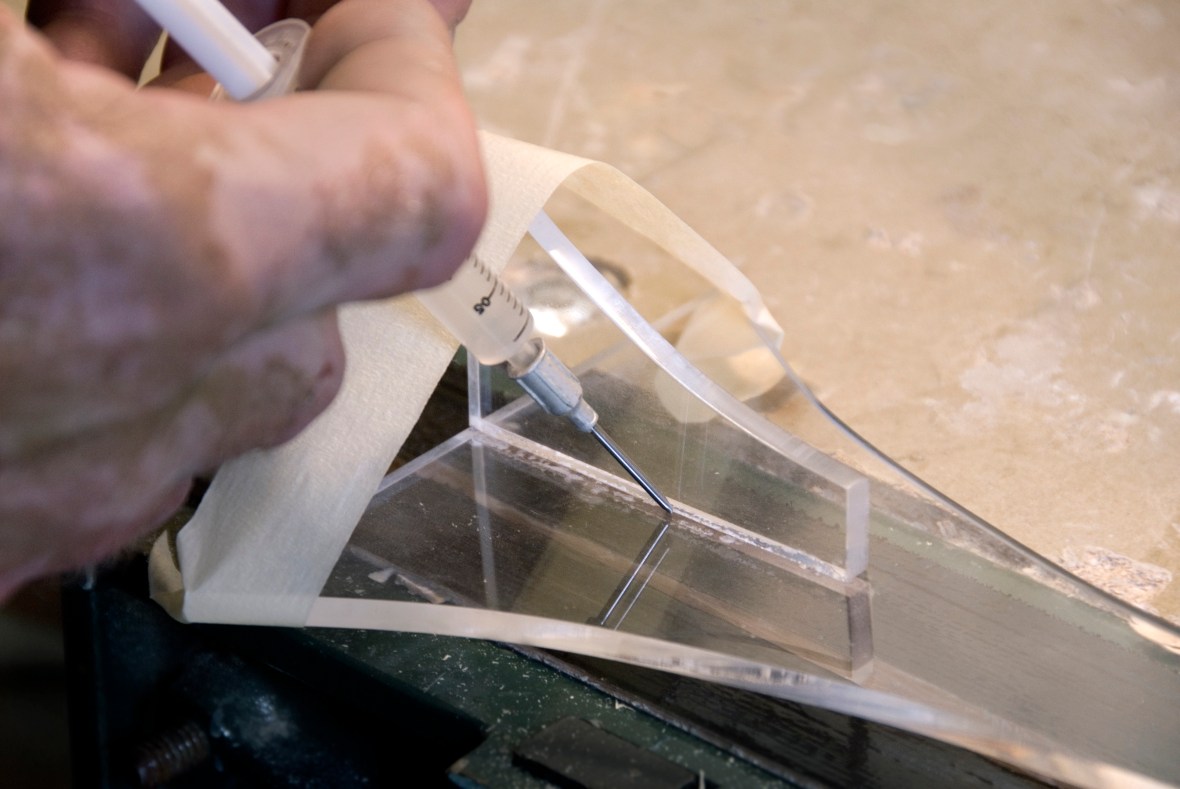
The answer was to use acrylic. A clear 10mm rod (the hole had become enlarged) was rotated 10cm above a gas ring until flexible, bent to the correct angle and held in a jig until cool. When cut to length the two halves of the carving were held at an angle of 20°. The stand was cut from a clear sheet of 4mm acrylic on the band saw. Chipping is avoided if sellotape is stuck to both surfaces of the line. The edges were sanded progressively to 600 grade wet & dry paper and finished with cutting compound. The side supports were bonded to the main part of the stand using “Fusion” adhesive. The two pieces were lightly held in position and the adhesive introduced using a hypodermic syringe run along the joint line. Capillary action gave an almost instant, strong and invisible bond. Finally two lugs were fixed to the connecting rod to aid location and the project was complete.

Reflections
This was certainly, an ambitious first project that grew by accident and it was only having a good teacher that made it possible to complete it.
There are a couple of things that I would do differently. The tentacles end rather abruptly and I am still ambivalent about the use of stain and avoid it whenever I can.
I was pleased with the result and I think that it was that early success that encouraged me to continue and make carving my principal hobby in retirement.
