This was my second piece. I had gained some confidence from the first but this was to prove a real challenge
Not challenging in terms of detail but because of the complex shape and getting access to the interior.
The delicate shell, showing its spiralling interior, remains displayed on a shelf in the living room just out of reach of the pawing hands of grandchildren.
WHY?
Like most people I have strolled down the beach with the children or grandchildren picking up shells and casually discarding the broken ones.
I only became aware of the potential of these broken shells at a craft fair where slices of shell were being sold as jewellery.
I marvelled at the complexity of this simple form and at the same time saw a way of carving a shell that would show both its internal and external structure.
So I went back to the beach, this time just collecting the broken whelk shells. This was to prove a vital reference source as the project progressed.
How?

These were the shells he used as a reference
The first task was to take a complete shell and grind it down to reveal the spiral core.
I did this on a sanding machine but it requires great care as the shell is extremely hard.
The carving was to be made in three sections. This cut down shell provides a template for the central section but first it needs to be scanned and enlarged to a suitable size.
I would advise against using my image as it really needs to be used in conjunction with the shell it is taken from.

Setting out


The finished shell was to be 18cm long. Therefore the block of lime needed to be at least twice this length to give secure location points when the sections were fixed together for carving.
The 2cm thick central section was cut on a band saw.
The surfaces were sanded flat to 400 grade paper and the image of the central section traced onto the wood.
The outline of the shell on the centre section was cut out on a band saw and then redrawn on the outer sections.
These outer sections were also cut out leaving sufficient material to maintain strength at the fixing/clamping point.
The three pieces were then screwed together using three screws to attach each outer piece to the centre section.
In this way the three sections could be treated as one for carving the outer surface and each removed in turn to give access to the interior.
Roughing out
It was then a relatively simple matter to rough out the external shape of the shell.
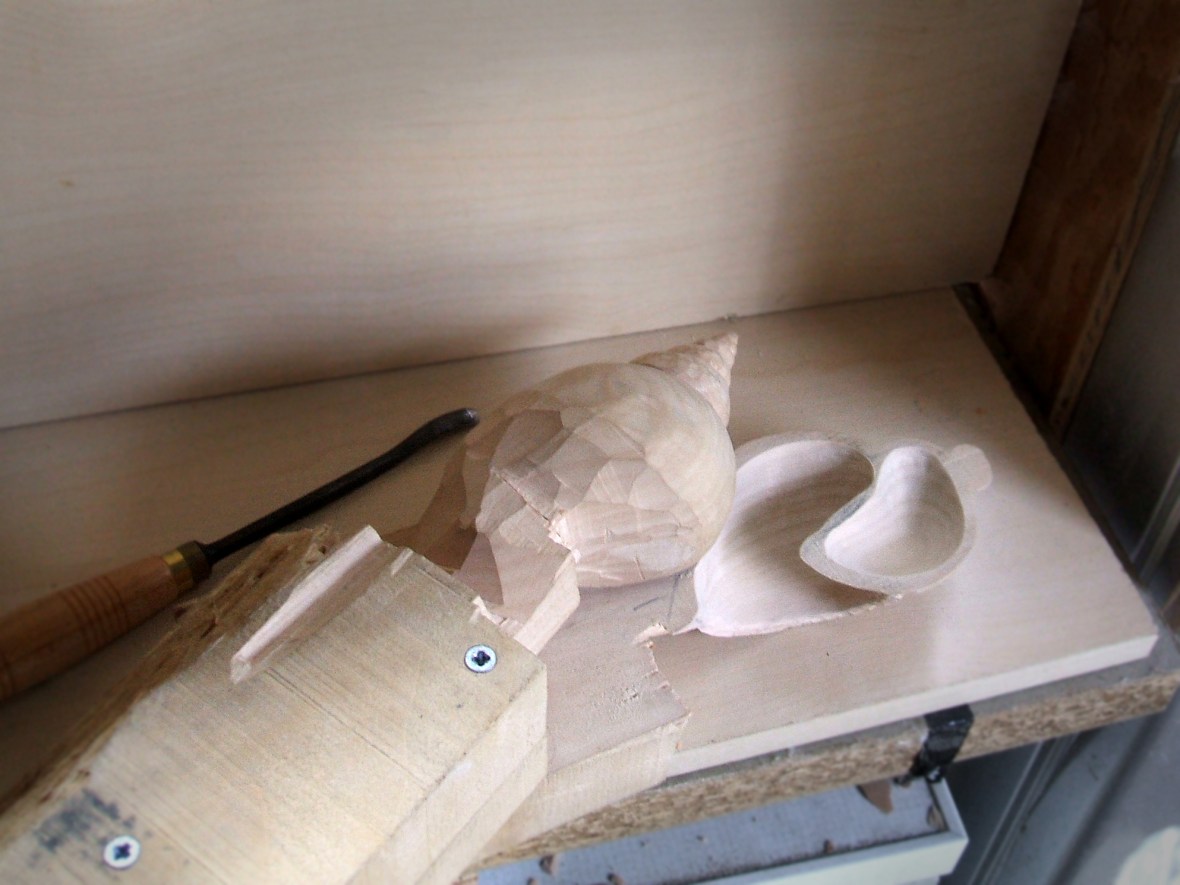
Simple in theory but in fact it’s quite tricky to maintain the integrity of the spiral. The centre line has to be constantly redrawn as you work around the circumference of the shell and I decided to stop when the outer was still very rough and oversize in order to concentrate on the interior.
Inside out
The screws were removed and the centre section pierced. The outline of the shapes was then transferred to the outer sections and the first tentative steps at hollowing out of these outer sections begun.
The reason for such care and hesitation was that the hollow parts of the shell were to have a thickness of no more than 2 mm or so.
Also, the external curve of the spiral continues on the inside of the shell as the animal grows. To compound matters one of the outer sections in particular, when viewed in isolation, seem to have a very strange counterintuitive shape, except when in contact with its neighbour.
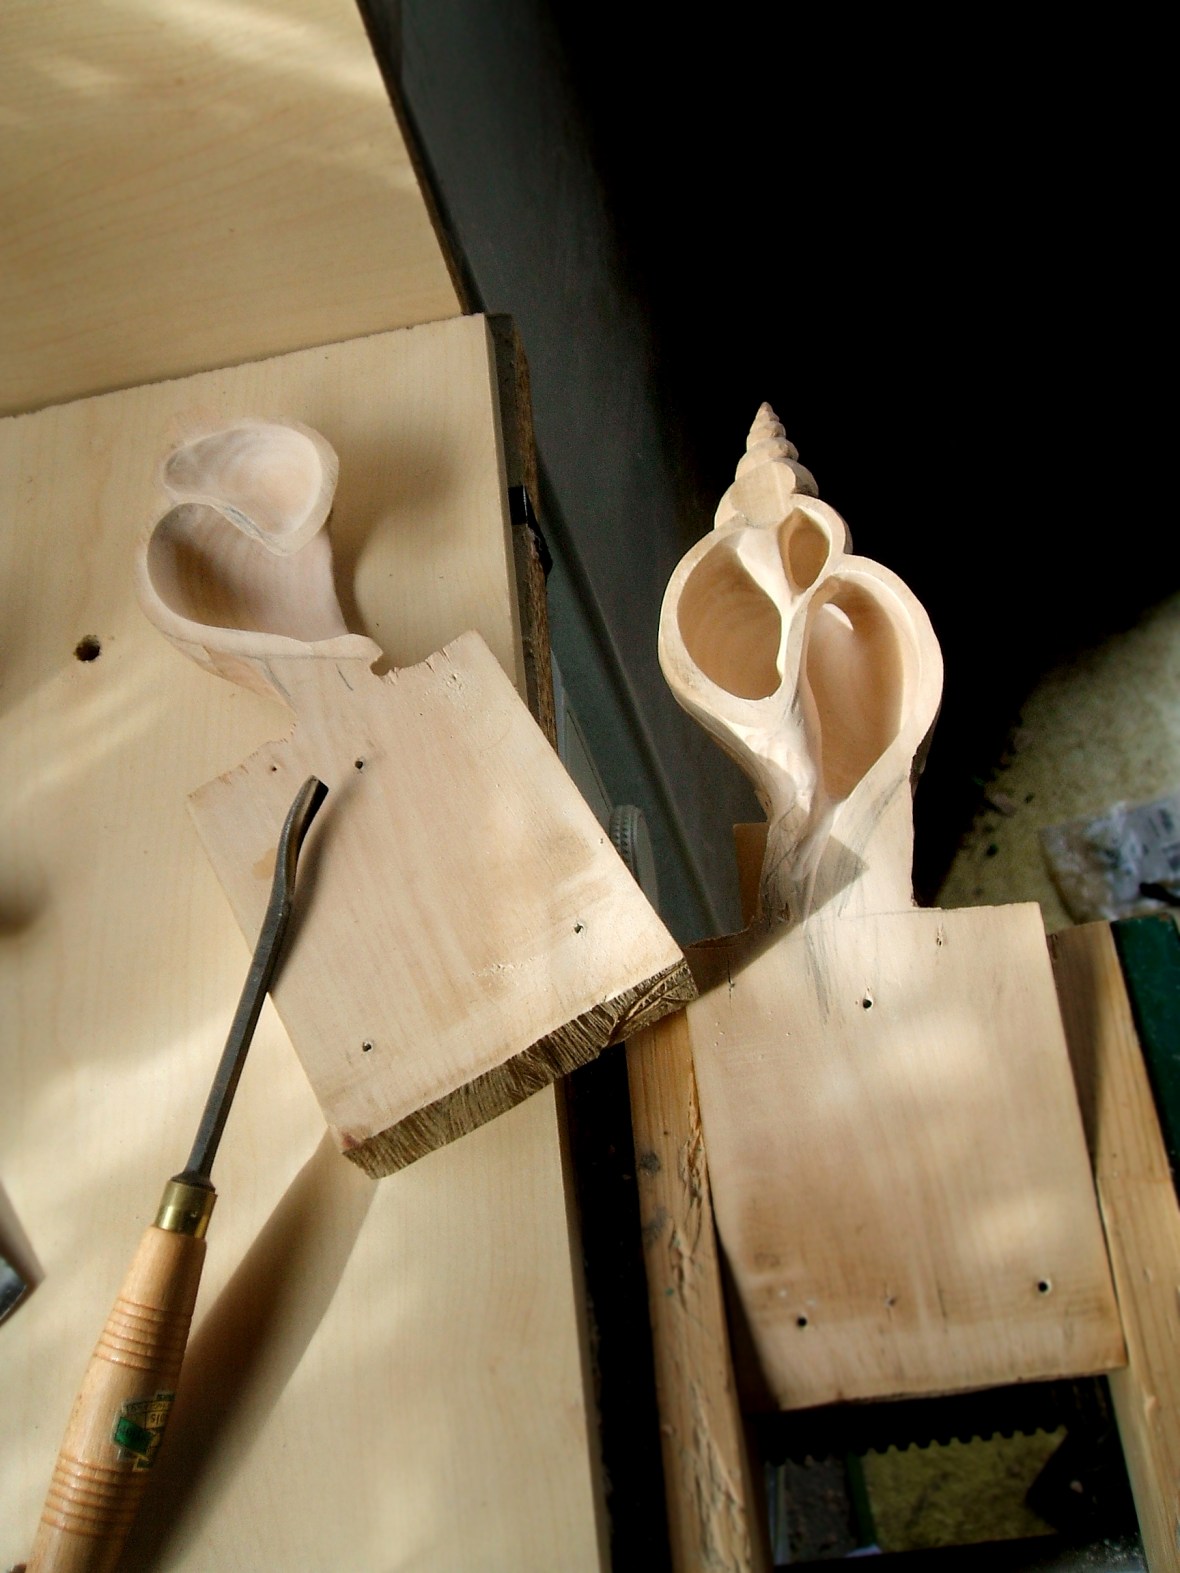
I found that the best way to deal with this was to methodically work with first, one outer section screwed to the centre section and then the other, gradually carving away from both of the inner and outer surfaces using gouges and spoons.
This involved many changes of side and much screwing and unscrewing but avoided the carving becoming lopsided and out of shape. It was vital to maintain the integrity of the spiral as it is very easy to lose track of where you are.
The margins are very small. It was essential to constantly refer to the collection of broken shells, particularly in relation to the central core of the shell.
Eventually as this stage in the process neared its conclusion I began sanding and refining the finish.
Assembly and breaking though
The surfaces were sanded true and flat and the enclosed side (opposite the shells opening) glued and lightly clamped to the centre section.

Once the glue was set the interior was given a final finish to 400 grade sandpaper as this is the last time it would be accessible. The process was repeated with the other side and then given its final sanding while still attached to the clamping point.
The thickness of the shell was no more than two or 3 mm and it was a simple matter to break the carving I had spent so much time on.
I chose the breakthrough point and sanded it away with course paper until it was flexible and paper thin, whilst still maintaining the curve of the shell.
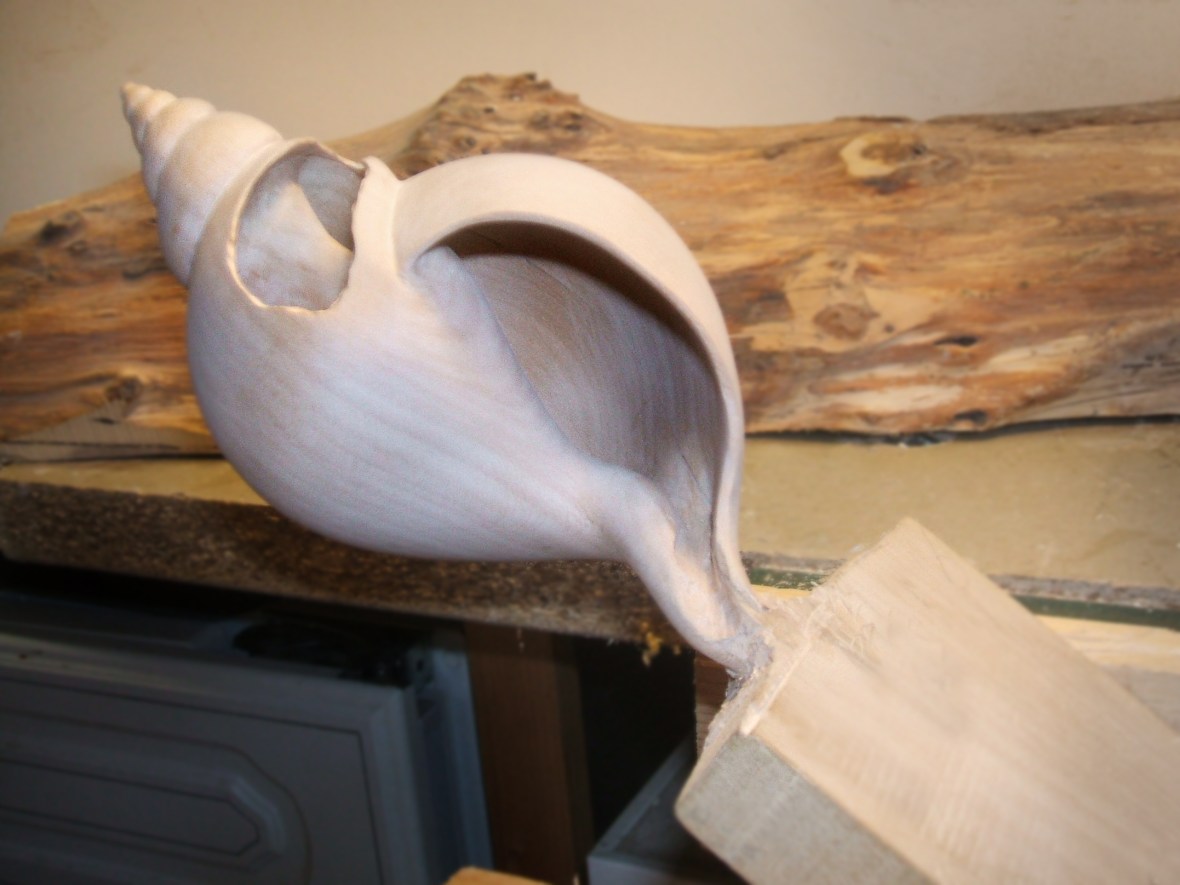
I finished with 400 grit paper and then light finger pressure was enough to give a natural break.
Finally the carving was removed from its clamping peace and finished with a sanding and waxing to all accessible surfaces.”
The display stand
To display this delicate shell a simple and unobtrusive stand was required.
I made this from fine high tensile piano wire and very aluminium tube available from model shops.

The wire was cut, bent to shape and glued into the tube with epoxy resin.
A small blob of resin was put on the ends of the exposed wire to avoid scratches to both the carving and furniture.
Reflections


Despite being a very early endeavour this is still my favourite piece. There are no obvious faults and it looks very realistic. The joins are practically invisible and most observers struggle to work out how it was done.
I have completed more complex and challenging pieces since but in every case there are flaws and faults which I wish I had dealt with at the time.
Finally it has to be said that without the help and support of my teacher, Mike, none of this would have been possible.

Beautiful and thank you for the detailed step by step of the whole process.
LikeLike
Thank you very much Alwena. Will be putting some others up very soon.
LikeLike